Saturday, November 5, 2011

Scratch Built Arm


Using the club blueprints I scratch-built one of R2's two utility arms. I am happy with how it turned out. I am going to prime it and see where it needs some filler. They are not going to be articulated, just inset in his body to provide more detail.

It was fun to do and I am sure the second one will go more quickly.


Sunday, October 30, 2011

R2 Test Drive

I rebuilt the feet and have the Jaycar motors mounted on the styrene mounts according to the blueprints. I had to to bolt some third-party wheel hubs onto the Banebots wheels, but they seem to be pretty sturdy.

The 12V 7Amp motor is plenty powerful. It is going to take some getting used to the controls because it is easy to go too fast and jerk all around.

It was a good test because I discovered that I really need to reinforce the connection between the ankle and the feet. The right foot especially was way too wobbly.

And, I have to figure out how to keep the wheels from falling off the drive motor shaft when the set screw works it way loose. I can only get about 10 minutes of drive time before a wheel falls off. :(


Friday, August 19, 2011

LED Belt Buckle


I was reading the posts on the Yahoo! R2 Builders forum and someone posted a link for inexpensive LED belt buckles that they found on eBay! For ten bucks you get a programmable, scrolling white LED belt buckle that is just the right size to go behind the logic surrounds. Put a backlit film printout of the PSI lights in front and you've got yourself one tasty flashing logic display served up cheap!

The Mighty-Mite!!


I got a Chicago Electric 4" Mighty-Mite tabletop table saw for my birthday. Thanks, honey! It is just the thing to zip through styrene and sintra. I set up a guide and was able to cut several 3/4" strips for fabricating the shoulder horseshoes lickety-split. The only drawback is that is has a tendency to tip forward, so I had to shim it in front to keep it stable. This will definitely help keep the tennis elbow at bay!

Radar Eye and Lens


I found a nice blue spray paint at Douglas Hardware that matches the dome vinyl I got from Tim almost exactly. It is Valspar All Purpose Gloss Blue. I was using the Rustoleum Deep Navy initially, which is probably more spec accurate, but it was way too dark next to the vinyl.

I also fabricated a lens for the radar eye out of a 2 liter bottle. I used the radar eye to mark the rough size and then trimmed it down. I painted the backside with Testors Gloss Black model spray paint. Viola! Instant lens!

Thursday, July 28, 2011

Dome Vinyl


Tim, my friend from work, cut some dome vinyl for me on his most excellent 24" vinyl cutter. I did the layout in Adobe Illustrator and initially made a paper template to check the fit.

Once I tweaked the layout, Tim did his vinyl magic. He also included some nice guidelines to help aid in aligning the vinyl along the dome bottom.

I cut 1/2" strips for the dome ring. They went on without a hitch and it is difficult to see where the pieces join together.

Saturday, June 25, 2011

Dome Ring Strips


After a building hiatus, I finally made some time to put the styrene dome ring strips on the bottom of the dome. I was going to put one layer of strips on, but decided to add a second layer to bring them flush with the thickness of the dome.

Weather permitting, I hope to prime it this weekend. Then early next week I can paint it chrome.

Also, I got the masking frisket this week from Dick Blick. My test was successful to see if it would not pull the paint off. It worked beautifully, much better than blue painters tape. With any luck I can start masking out the blue areas next weekend.

Sunday, May 1, 2011

Chrome Dome


After lightly sanding the primer, I gave the dome the first coat of Rustoleum Chrome Shiny Metallic paint. I am very impressed with the results. I am going to lightly sand it tomorrow and then give it another light coating.

I have noticed some stippling on some of the resin parts where maybe there was still some releasing agent on them, despite a thorough washing and cleaning with alcohol. I will sand those spots and touch them up again.

Friday, April 29, 2011

Priming the Dome


I put the first coat of primer on the dome this afternoon. Perfect painting and drying weather outside! Tomorrow I hope to fine sand it and give it another light coat.

If I get to the hardware store tomorrow, I'll get the silver paint. A silver dome by Sunday night would be fantastic!

Wednesday, April 27, 2011

Dome Progress


Well, I got all of the holes cut for the miscellaneous inserts. I also sanded the dome lightly in preparation for painting. Over the weekend I got a start on gluing in all of the dome pieces, and I was able to finish it up last night.

Hopefully tonight I can mount the last HP, glue the dome to the base and prime everything. If I am extremely lucky, I may even be able to paint the dome silver this weekend.

Sunday, April 17, 2011

Cutting the Dome Holes


Well, the planets were all in alignment today and I got several hours (!) of time to work on R2. After futzing around looking for suitable hole templates, I finally decided to bite the bullet and use the Dremel tool with the circle cutting attachment to cut the holoprojector holes.

I did a test cut on a scrap of Sintra to make sure the hole would be the right size. I then drilled a pilot hole in the center, fired up the Dremel, said a prayer, and then plunged in.

As it turned out, my anxiety was for naught. The Dremel tool made a perfect hole with very few plastic schnibbles to clean off the edge. I used a standard 1" hole cutting bit with my cordless drill for the PSI holes. Nice and smooth!

I got the rear logic display and one of the front logic displays cut out but by then I had to attend to the boys, who were in each other's business again. Big surprise.

Adventurous plan for this week: one more front logic to cut out. Sand the hole edges and prep the dome for painting. Glue in the HPs and logic displays. Glue the dome to the base ring. Prime.

Monday, March 28, 2011

Dome Markings


I made a 360° measurement strip to go around the dome circumference to aid in determining where the dome details go. Astromech.net had some great references for showing where all of the dome panels should be placed, all defined by degrees around the dome.

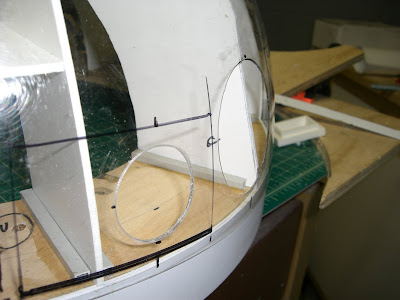
I measured 3/8" up from the bottom of the plastic dome for a baseline and built up from there. I was able to get a majority of the panels drawn on the dome and tomorrow I hope to get the holes marked for the holoprojector eyes, logic surrounds and status lights.

Saturday, March 26, 2011

Dome Support


I fabricated some dome support ribs from 1/8" Sintra with a 4-1/2" piece of PVC pipe for the hub.

I plan on putting some curved cross-support pieces in, as well as some pieces on the dome base to aid in alignment.

Once I have all the holo eyes, logic displays and the radar eye in place, I want to reinforce the empty areas with Big Stuff Large Gap expandable foam. The can says that it sticks to anything!

Tuesday, March 15, 2011

Resin Radar Eye and Logic Displays


After a two-and-one-half-month wait, the resin parts I ordered for the dome have arrived! And they are beautiful. I might have to bring the dome to work to get anything done on it, but first I need to finish those pesky shoulder horseshoes!

Tuesday, February 8, 2011

Electronics are Online!


I finally got around to figuring out the electronic controls setup for R2. After nosing around the sparse documentation online, I finally bit the bullet and asked for help in the forum.

Fortunately for me, David L., who recommended this configuration, was very helpful with the controller settings. And once I emailed him pics of the configuration, he was able to tell me that I had some wires connected improperly to the receiver. After that, viola! Actual working RC controlled Jaycar motors. It was a thing of beauty! Thanks David!

Now I need to get those puppies installed into the feet and get this build moving, literally and figuratively!

Sunday, January 23, 2011

Foot Progress


I made plywood centers for R2's feet. I decided to use some scrap plywood and 1x2s. I started skinning one outer foot and it is moving along nicely! I've been using contact cement to adhere the styrene to the wood and it's working well. I'm holding off finishing the outside until I get the drive motors mounted.

I got a cheap caster for the center foot online for $4.00, with free shipping! Amazing!

I also got a 12V 7Ah battery with a charger. Now I just have to pick a few brains online on how to configure the electronics.

I may take the feet to work to continue the build on my lunch breaks. Hopefully by next weekend the feet will be finished and I can start on the battery boxes.

Tuesday, January 11, 2011

Parts

I finally got around to taking pictures of the parts I have ordered over the last month and a half.


I got the VEX 6-Channel Remote Controller from Ebay for $40. The non-vex receiver was 9 bucks.


I also got the Jaycar motors for the feet (from New Zealand), the Sabertooth 2x25 speed controller and the wheels from Banebots.com. I hope to use the smaller wheels to drive the larger wheels since I don't have a source for fabricating the elusive aluminum drive hub.

I started building a wooden interior for the main feet where the motors and wheels will be mounted. My success with the wood/styrene combination for the dome ring inspired me to try a wood structure for the feet. That, and the fact that wood is much easier to cut. I am still nursing my tennis elbow and that 1/8" styrene is a bear to cut.

Now hopefully a trip to Douglas Hardware tomorrow for screws and bolts will allow me to start the process of getting R2 motivated!